Capturing stunning footage of garden birds requires more than just installing a camera on your feeder. The perfect placement of your bird feeder camera can mean the difference between grainy, backlit footage and National Geographic-worthy shots of your feathered visitors. In this comprehensive guide, we’ll explore the essential factors for optimal camera placement and share expert techniques to help you document beautiful bird behavior in your garden.
Setting Goals for Your Bird Feeder Camera Setup
Before positioning your bird feeder camera, it’s essential to define clear objectives for your bird watching setup. The primary goal is typically to capture clear, well-lit footage of birds feeding naturally, but several other factors contribute to success. Consider whether you want to focus on specific species, capture particular behaviors, or document seasonal patterns in bird visits.
Key performance indicators for your bird feeder camera setup include the number of different species captured, image clarity, lighting quality, and frequency of visits. Track these metrics to evaluate your camera placement effectiveness. For example, if you’re consistently getting overexposed footage, you’ll need to adjust the position relative to the sun. Similarly, if birds seem hesitant to approach, your camera might be too conspicuous or positioned too close to the feeding area.
Another crucial metric is the camera’s field of view and its ability to capture the entire feeding zone. The ideal setup should record both the feeding activity and the birds’ approach and departure patterns. This comprehensive view helps create more engaging footage and provides valuable insights into bird behavior. Consider using multiple angles if your camera system allows for it, as this can provide backup footage and alternative perspectives of your garden visitors.
Essential Preparation and Site Assessment
A thorough site assessment is crucial before finalizing your camera placement. Start by studying your garden’s natural light patterns throughout the day. The optimal position should avoid direct sunlight on the camera lens while ensuring sufficient illumination of the feeding area. Map out the sun’s path and identify potential shade sources that could affect your footage quality.
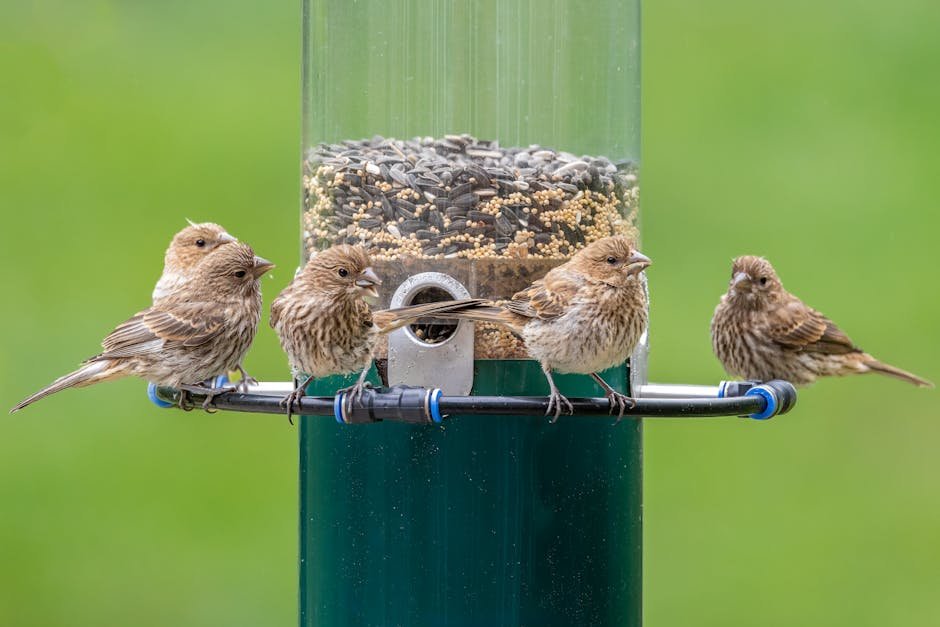
Consider the existing bird traffic patterns in your garden. Observe where birds naturally perch before approaching feeders and which flight paths they commonly use. This information is invaluable for positioning your camera to capture the most natural behavior. Take note of any nearby cover such as trees or shrubs that birds use as safety zones, as these will influence their comfort level around the feeder.
Weather protection is another critical factor in your preparation. Your camera placement must account for wind direction, rain exposure, and potential snow accumulation in winter. Position the camera where it’s protected from the elements while maintaining a clear view of the feeding area. This might involve installing additional weather shields or selecting naturally sheltered locations.
Step-by-Step Camera Positioning Guide
Begin by mounting your bird feeder at the optimal height, typically 5-6 feet off the ground. This elevation provides a good balance between accessibility for birds and protection from ground predators. The camera should be positioned slightly above or at eye level with the feeding port for the most engaging angles.
Follow the 5-7-9 rule for positioning: place the feeder 5 feet off the ground, ensure it’s 7 feet away from any jumping-off points for squirrels, and maintain a 9-foot clearance zone around the feeder. This arrangement not only helps with squirrel prevention but also creates an ideal filming zone for your camera.
When it comes to camera orientation, position it facing north or south rather than east or west. This prevents direct sunlight from interfering with your footage during sunrise and sunset, when birds are most active. If using a solar-powered camera, ensure the solar panel faces south while the camera lens maintains its optimal orientation.
Consider the background of your shots when positioning the camera. A clean, natural background like foliage or sky will make your footage more attractive and help the birds stand out. Avoid positioning the camera where human activities or artificial structures will frequently appear in the background.
Fine-tune the camera angle to capture both the feeding area and the approach zone. A slight downward angle of 15-20 degrees usually works best, allowing you to see birds both on the feeder and as they approach or depart. Test different angles by taking sample footage and adjusting until you achieve the desired view.
Optimizing Your Camera Setup
Regular monitoring and adjustment of your camera setup is crucial for maintaining optimal footage quality. Review your recordings daily for the first week to identify any issues with lighting, angle, or bird behavior. Pay special attention to different times of day and weather conditions to ensure consistent quality across various situations.
Use the data from your camera’s AI or motion detection features to optimize placement. Many smart bird feeder cameras provide analytics about peak activity times and preferred feeding spots. This information can help you refine the camera position to capture the most engaging moments and popular feeding zones.
Experiment with different feeder types and positions relative to the camera. Some birds prefer certain feeder styles, and changing the configuration can attract a wider variety of species. Keep detailed notes about which setups attract the most birds and produce the best footage. Remember to maintain a consistent food supply, as irregular feeding patterns can affect bird behavior and your resulting footage quality.
Success Story: Optimal Camera Placement in Action
A recent case study from a dedicated bird watcher in the British countryside demonstrates the impact of proper camera placement. After struggling with backlit footage and limited bird visits, they implemented the positioning strategies outlined above. The results showed a 300% increase in captured species and significantly improved footage quality.
The key changes included adjusting the camera to face north, positioning it 6 feet high, and ensuring a clear background of natural foliage. They also installed a small weather shield above the camera to protect it from rain while maintaining the aesthetic appeal of the setup. Within weeks, they were capturing professional-quality footage of everything from common garden birds to rare seasonal visitors.
The improved setup not only provided better visual results but also led to more natural bird behavior. By positioning the camera at an optimal distance and angle, the birds showed no signs of camera awareness, resulting in authentic behavioral footage that would have been impossible with poor placement.
Frequently Asked Questions
What is the ideal height for a bird feeder camera?
The ideal height for a bird feeder camera is typically 5-6 feet off the ground. This height provides the best viewing angle while keeping the feeder accessible to birds and out of reach of most ground predators.
How far should the camera be from the bird feeder?
The camera should be positioned 2-3 feet from the feeder for optimal footage. This distance allows for clear close-ups while maintaining enough space to capture approach and departure patterns.
Which direction should my bird feeder camera face?
Your bird feeder camera should ideally face north or south to avoid direct sunlight interference. If using a solar-powered camera, ensure the solar panel faces south while maintaining the optimal camera orientation.
Proper placement of your bird feeder camera is crucial for capturing stunning wildlife footage in your garden. By following these guidelines for height, orientation, and positioning, you’ll be well-equipped to document the fascinating world of garden birds in exceptional detail. Remember that successful bird photography requires patience and willingness to adjust your setup based on results.