

Winter brings both beauty and challenge to UK gardens, especially for those passionate about feeding birds and capturing their visits on camera. As temperatures drop, keeping your feeder stocked and your camera working smoothly requires a bit of preparation and know-how. This guide will walk you through every step to ensure your winter bird feeding setup stays active and reliable, even in the coldest months.
What You Need Before You Start

Before you dive into winter bird feeding, it’s essential to gather the right tools and materials to ensure your feeder and camera can withstand the cold. Start with a sturdy, weatherproof bird feeder that resists frost and moisture—models made from metal or heavy-duty plastic are ideal for British winters. Choose feeders with easy-to-clean features, as hygiene is crucial when food can spoil quickly in damp conditions. For your camera, select a model rated for outdoor use, preferably with a weather-resistant casing and a reliable power source, such as a long-lasting battery or mains connection with weatherproof cabling.
Stock up on high-energy bird food, such as sunflower hearts, suet balls, and fat blocks, which provide essential calories for garden birds like robins, blue tits, and goldfinches. A squirrel baffle or guard can help protect your food from opportunistic mammals, while a cleaning brush and mild disinfectant will keep your setup safe for birds. If you’re using a Wi-Fi camera, ensure your signal reaches the feeder location, or consider a Wi-Fi extender. For those looking to upgrade, affiliate products like heated bird feeders or solar-powered camera batteries can make winter maintenance much easier and more effective.
Step 1 – Choose the Right Location
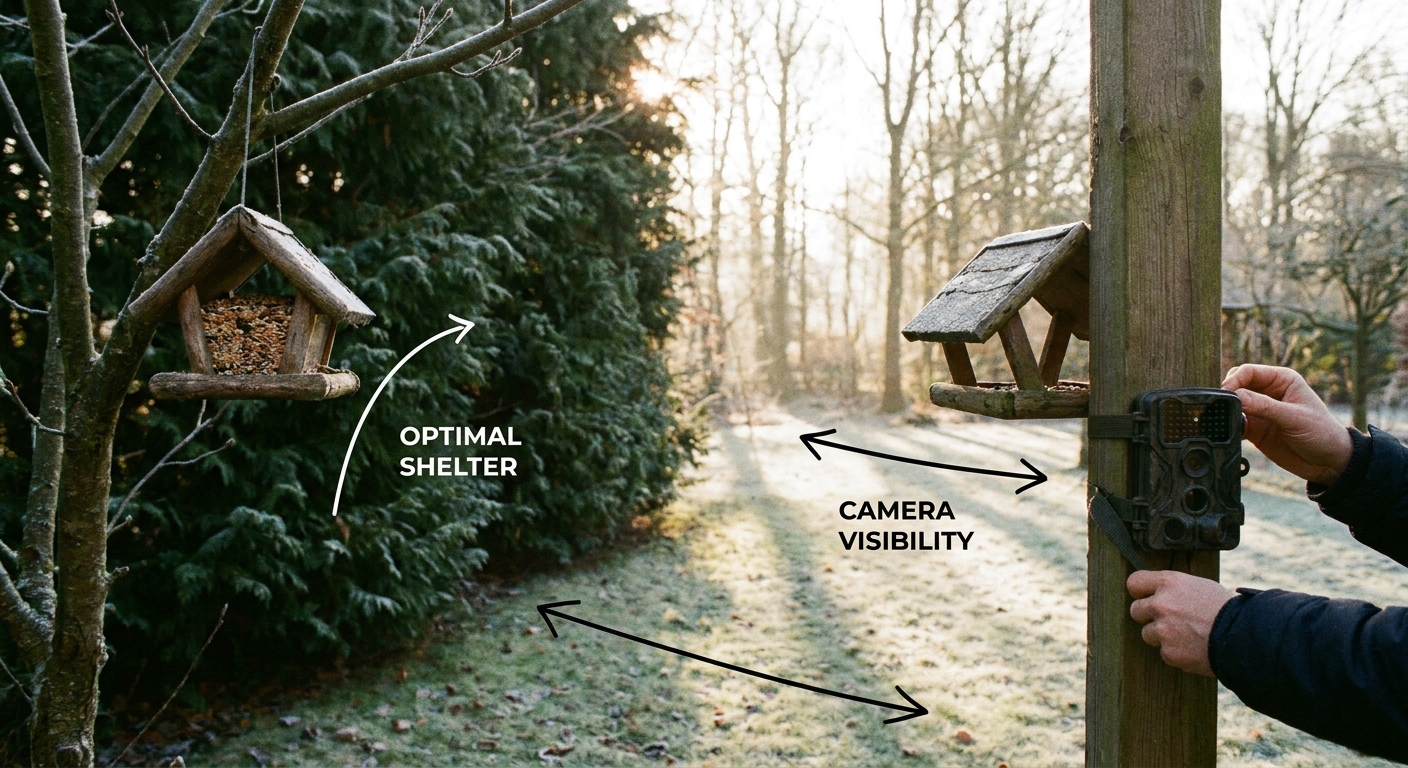
Finding the perfect spot for your feeder and camera is the foundation of successful winter bird feeding. Position your feeder in a sheltered area, such as near a hedge or tree, to protect birds from harsh winds and predators. Avoid placing it too close to dense cover where cats might hide, but ensure birds have a quick escape route. South-facing spots can help maximise sunlight, reducing ice build-up and keeping food accessible for longer periods.
When installing your camera, make sure it’s angled to capture the feeder clearly without being exposed to direct rain or snow. Mount the camera securely, using brackets or straps designed for outdoor use, and check that cables or batteries are protected from moisture. Take a moment to test your camera’s field of view and Wi-Fi connection before finalising the setup. Watch out for common pitfalls like glare from low winter sun or branches that might obstruct your lens as the wind blows.
Step 2 – Prepare and Maintain Your Feeder
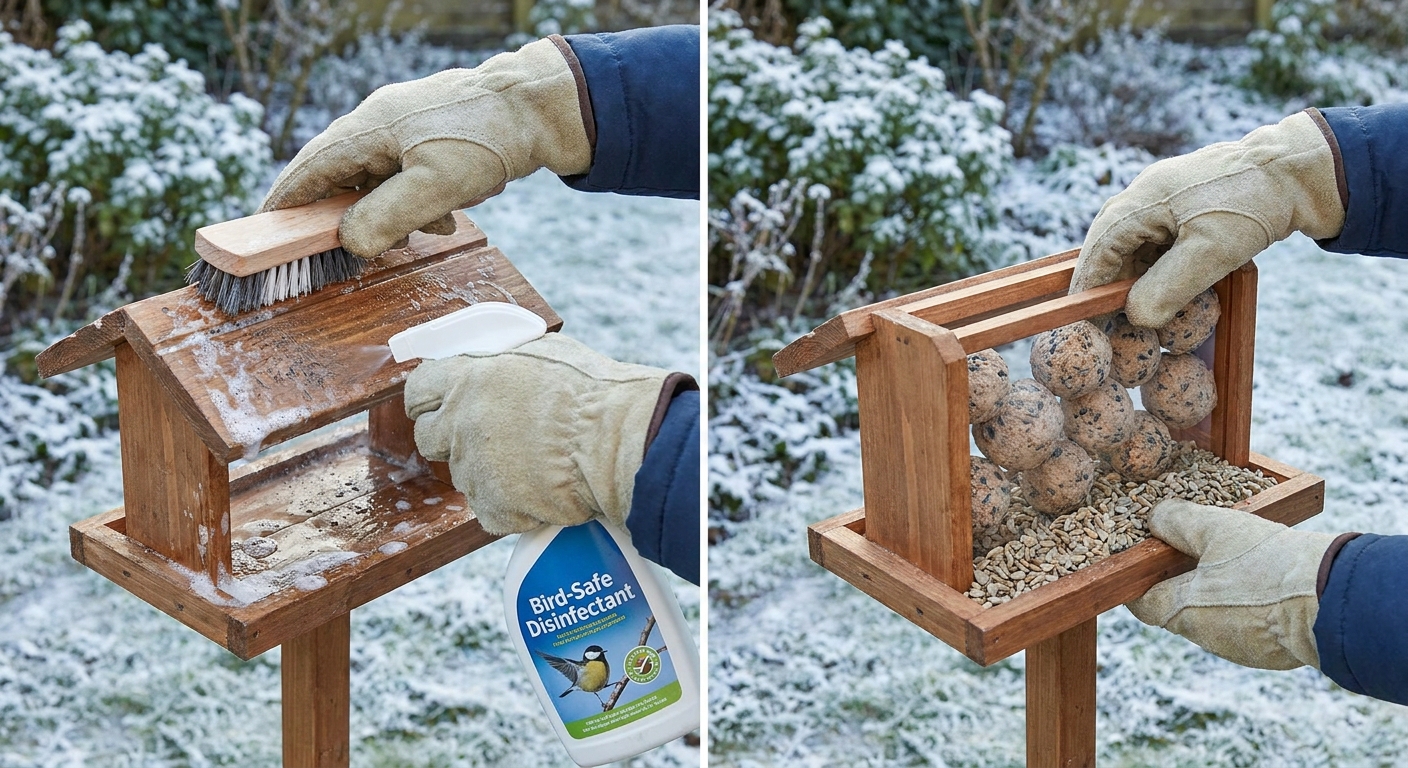
Once your location is set, it’s time to prepare your feeder for winter’s unique challenges. Begin by giving your feeder a thorough clean with warm water and a mild disinfectant, removing any old seed or residue that could harbour mould or bacteria. Rinse well and allow it to dry completely before refilling. Regular cleaning is especially important in winter, as damp conditions can accelerate the growth of harmful pathogens that threaten bird health.
Fill your feeder with high-energy foods that are less likely to freeze, such as sunflower hearts, suet pellets, and mealworms. Check the feeder daily to ensure food remains dry and accessible; clumped or frozen seed should be replaced promptly. Consider using a weather guard or tray to shield food from snow and rain. If you notice ice forming on perches or feeding ports, gently remove it to prevent injury to birds. These small maintenance steps go a long way in attracting a variety of species, from house sparrows and starlings to the ever-popular robin.
Step 3 – Keep Your Camera Operational
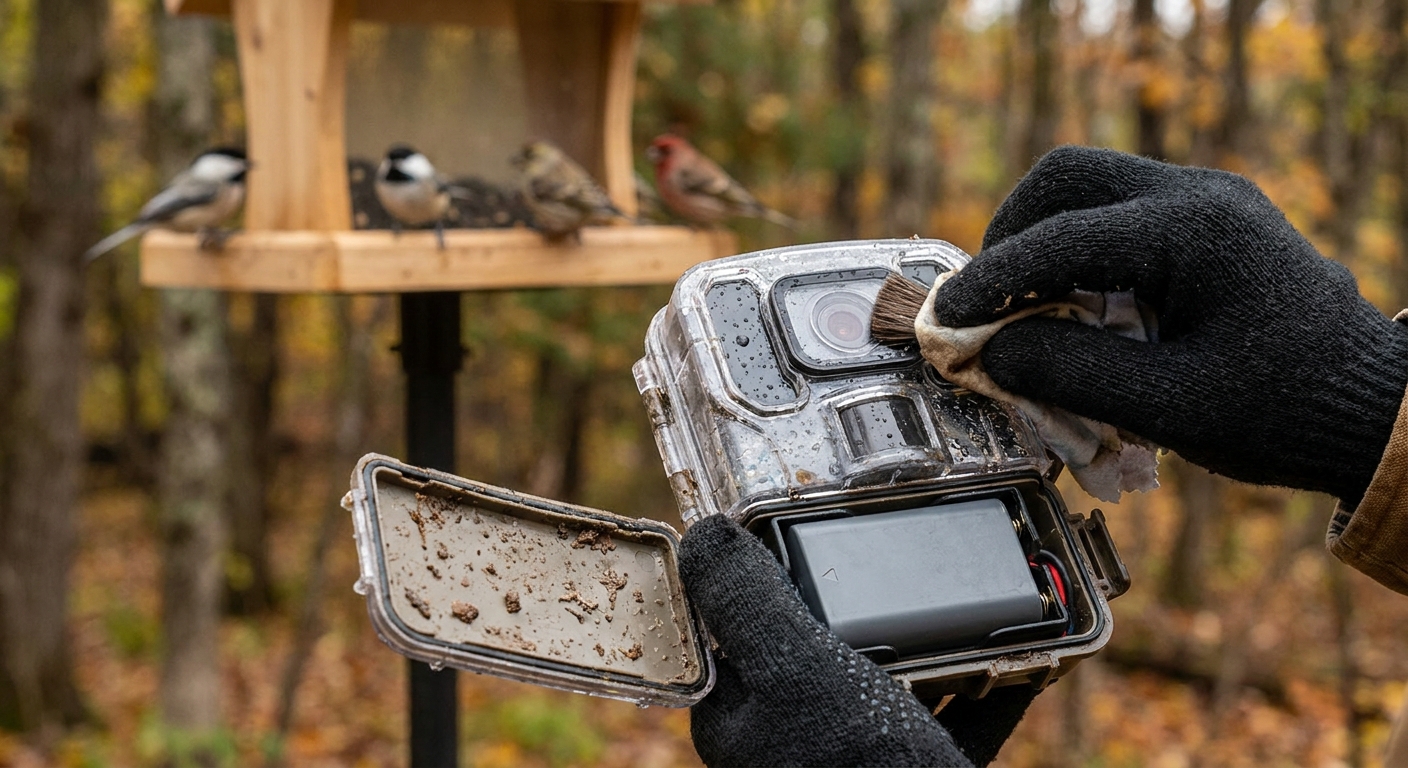
Maintaining your bird feeder camera in winter requires a proactive approach to both power and protection. Cold temperatures can drain batteries quickly, so opt for cameras with extended battery life or connect to mains power using weatherproof cables. If your camera supports it, consider a solar panel to supplement power on brighter winter days. Regularly check battery levels and recharge or swap batteries before they run low, as cold snaps can catch you off guard.
Protect your camera from moisture by using a weatherproof housing or a simple DIY cover, such as a small plastic hood, ensuring it doesn’t obstruct the lens. Wipe the lens regularly to remove condensation or frost, which can blur your footage. Test your camera’s connection and recording settings after heavy weather to confirm everything is working as expected. By staying attentive, you’ll capture crisp images of blue tits, coal tits, and blackbirds even during the chilliest spells.
Common Problems and Fixes
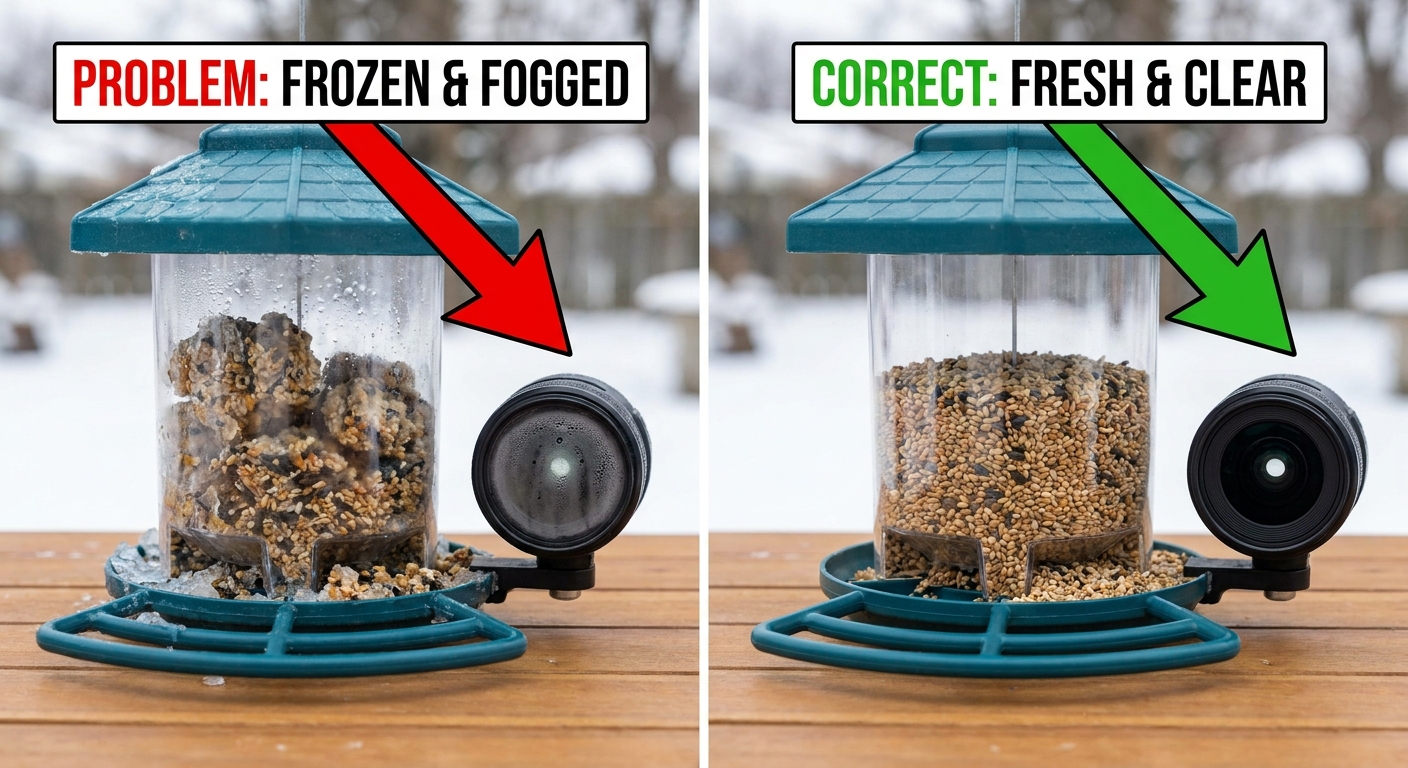
Winter bird feeding comes with its share of challenges, but most issues can be resolved with a bit of troubleshooting. One common problem is frozen or clumped seed, which discourages birds and can lead to waste. To fix this, check your feeder daily, replace any frozen food, and use weather guards to shield against snow and rain. If your feeder is prone to icing, try moving it to a sunnier spot or adding a small tray underneath to catch drips and prevent freezing.
Camera issues are another frequent concern, especially with cold-related battery drain or fogged lenses. If your camera stops recording, first check the power source and connections. Recharge or replace batteries as needed, and ensure all cables are dry and secure. For foggy or frosted lenses, gently wipe with a soft, dry cloth and consider using a lens hood or anti-fog spray. If your Wi-Fi signal drops, reposition your router or add a Wi-Fi extender to maintain a strong connection.
Finally, you may notice fewer birds visiting during particularly harsh spells. This is normal, as birds seek shelter during storms or extreme cold. Keep your feeder stocked and visible, and avoid sudden changes in food type or location. With patience and regular maintenance, your garden will soon be bustling with activity again, featuring favourites like goldfinches, great tits, and blackbirds.
Tips for Better Results
To get the most from your winter bird feeding setup, consistency is key. Refill feeders at the same time each day, ideally in the morning, so birds can rely on your garden as a dependable food source. Vary your offerings by mixing seeds, suet, and mealworms to attract a broader range of species. Placing multiple feeders in different locations can reduce competition and give shy birds, such as coal tits, a chance to feed undisturbed.
For your camera, experiment with different angles and heights to capture unique behaviours, like robins hopping between branches or starlings flocking together. Use motion detection features to save battery and storage, and review your footage regularly to spot new visitors. If you’re sharing your birdwatching highlights online, label your photos with species names to help others identify common UK garden birds. These small touches turn your winter feeding station into a hub of wildlife activity and learning.
Frequently Asked Questions
How often should I clean my bird feeder in winter?
It’s best to clean your bird feeder every one to two weeks during winter, or more frequently if you notice mould, wet seed, or droppings. Regular cleaning helps prevent the spread of disease among garden birds.
What food is best for birds in cold weather?
High-energy foods like sunflower hearts, suet balls, fat blocks, and mealworms are ideal for winter. These provide essential calories to help birds maintain body heat during cold spells.
How can I stop my bird feeder camera from fogging up?
To prevent fogging, use a weatherproof camera housing and wipe the lens regularly with a dry, soft cloth. Anti-fog sprays or lens hoods can also help reduce condensation on the lens.
Will birds still visit my feeder during snow or frost?
Yes, birds often rely on feeders even more during snow or frost, as natural food sources become scarce. Keep your feeder stocked and accessible to support them through harsh weather.
What UK birds am I likely to see at my feeder in winter?
Common winter visitors include robins, blue tits, great tits, goldfinches, house sparrows, starlings, blackbirds, and coal tits. Each species has its own feeding preferences, so a varied menu will attract a diverse crowd.
Winter bird feeding is a rewarding way to support local wildlife and enjoy close-up views of your favourite UK garden birds. With the right preparation and a little ongoing care, your feeder and camera can thrive even in the coldest months. Whether you’re a seasoned birdwatcher or just starting out, these steps will help you create a safe, welcoming haven for birds all winter long.